Showing posts with label Planter Box. Show all posts

Tuesday, August 12, 2014

Reclaiming the Planter Box: Part Two

When I began pulling up the weeds that had overtaken the planter box in my new back yard, the intent was to pull up everything and start again from scratch. However, as I got further in, there were some plants I found that interested me. There were some huge red clover plants, which my bunnies love to snack on. I found some stray morning glories, which are one of my favorite types of flower. There were also some plants I could not immediately identify.


Vicia cracca

The first one was a vine that sprouted tufts of purplish-blue, tiny, bell-shaped flowers. As I was working, bumble bees and monarch butterflies would land to feed on the nectar, mere inches from my head. It brought a smile to my face every time. After some research, I found out it was Vicia cracca, also known as cow vetch or bird vetch. It's used to feed some forms of livestock and increase their milk production. I don't have any animals of this type yet, so it serves me little practical purpose. I decided to leave it anyway, because of the insect life it attracted. We also caught a glimpse of a hummingbird once. I want to encourage these lovely pollinators to keep returning to my property.


Galium asprellum

Another one that caught my interest wasn't anything special visually. When I pulled it up, though, or damaged the leaves in any way, it exuded a sweet herbal aroma. I became convinced that it must be some kind of herb. I was wrong. It was Galium asprellum, or rough bedstraw. Back when mattresses were stuffed with hay, this was often used, but the stems have little hairs, which become prickly when the plant is dry, hence the name. I did find that it has some medicinal uses, specifically calming symptoms a friend of mine with a chronic condition experiences. I offered her some. If it helps, I'll keep growing it.

At this point, I was still uprooting unwanted plants. I would have to decide before the next phase whether I was going to continue working around the plants I was keeping, or if it would be better to transplant them. That's a story for another day.

Tuesday, August 5, 2014

Building the Potato Condo: Part Two - The Assembly

By the time I finished preparing and laying out all the pieces of the potato condo, I had already accumulated all the tools I needed.

Here's the full list:

  • Hand Saw
  • Jigsaw
  • Oscillating Power Sander
  • Drill
  • Wood Screws

Now it was time to start putting everything together. I began with the sides. There were two beams of the first pallet that had broken in half the long way when I was making my first fumbling attempts at pallet disassembling. I used these as the frame for the structure, and started screwing the slats into place. I made sure to drill holes for the screws first, to avoid cracking the wood, as well as making the job easier.

Here you can see the front in progress, and then from the back once I completed the side. I made sure that the bottom was level, but decided the top didn't have to be, and the uneven line contributed to the rustic aesthetic.

When I was a kid and learning the fundamentals of building by helping my dad, he taught me some crucial sayings, including "measure twice, cut once." I didn't follow his advice this time, and I paid the price. Because I had eyeballed the majority of my measurements, not all of the slats were the exact same length. I solved this issue by cutting twice, using the jigsaw to remove any excess hanging over.

The front and back panels were completed in a similar manner, but the lengths of the slats did not have to be evened out. Instead, I decided to center them and allow the "imperfection" to become part of the design.

I attached the slats of the front and back panels to the same frame pieces that held the sides. During this phase, I had to be careful in the placement of my screws to be sure that none intersected.

Finally, on the front panel, I wanted to add a feature that would make it easy to harvest potatoes from the bottom of the container, rather than having to pull up and replant every time one was ready. I could always unscrew a few of the slats at the bottom, but I knew there was an easier way.

I used some scrap wood to attach three slats together, so that only two screws attached all three slats to the frame. This meant I could easily remove two screws, pull some potatoes, and then replace the panel. This design can easily be adapted to work with a hinge and a latch, but I didn't have any hinges lying around, and I had already made quite a few trips to the hardware store. Frankly, I was getting tired of all the driving.

Once everything was secured in place, I took the power sander to it again, just to make sure there weren't any splinters I may have missed. Structurally, the potato condo was complete at last. If I were growing outside and didn't care for any decoration, I could put it out in the yard as is and start planting. However, I did want to gloss it up a bit, and I didn't want water draining all over the floor in my basement, so I had a little bit more work to do. That's a story for another day.

Tuesday, July 22, 2014

Building the Potato Condo: Part One - Reclaiming the Wood

In a new homestead, it takes some planning to figure out what you're going to plant and where. To optimize the space you have, you'll have to find the most suitable area for each type of plant, and you also have to worry about running out of space. It's not always easy to find a spot with proper amount of sun, drainage, pH, temperature, etc. One thing I was sure I wanted to grow was potatoes. A true Irish girl at heart, I love potatoes. I could eat them every day.

I decided that this would be one of the indoor plants for several reasons. First of all, this way they could produce year-round. Secondly, potatoes do great in containers. Finally, by the time the homestead was ready for planting, it was already late in the season for planting. Any outdoor crop the first year would be scant and possibly under ripe. In my online search for the needs of different potato species, I found a container known as the potato condo. I liked the idea.

The previous owners of the house had left a few pallets behind when they moved out. My first thought was that I could disassemble them in order to build my own potato condo. I put on my work gloves and glasses, and I took a hammer to the first pallet. I should mention that this was my first time attempting to dismantle a pallet, and these were very old. It didn't go as easily as I expected.

After working up a sweat hammering and prying for twenty minutes or so, I didn't have much to show for it.

The wood was rotted in places and the nails were rusty. I wasn't going to be able to hammer and pry it apart with just a hammer. My husband offered to just buy me some new lumber, but at the same time, I want to teach myself how to reclaim wood from a pallet. I would have to discard a large portion of these particular pallets due to the quality. I wasn't going to trust it to hold my food. If you haven't noticed yet, I'm pretty darn stubborn. Even if it became two separate projects, I was going to break down this pallet, and build a potato condo.

We took a trip to the hardware store, where we picked up a chisel set, a handsaw, and a large crowbar. They helped a lot. After a few days putting in an hour or two of work each, I had roughly half of the pieces laid out for the final structure. My back was starting to hurt. I didn't have sawhorses, so I was working on the floor for long stretches of time. I also realized that I was going to have to sand the wood. Some pieces were more splintery than others, but even the smoother pieces would look better after a good sanding. I just didn't have the oomph to do it all by hand. So, we took another trip to the hardware store. This time we came back with a jigsaw and a power sander.

I went right back to work, and within a couple hours, I had finished cutting the rest of the pieces I needed and I was ready to start buffing them out.

As you can see, the wood wasn't very pretty at first. I told myself that was okay, I could always stain or paint it. However, as I began buffing, the natural wood grain really began to pop and show real depth. It looked far better than I expected that it would. You can see the clear difference in the image below.

Because I had used two pallets of different ages, that had been stored separately and expressed different amounts of wear, the color still wasn't uniform. I still had more time to decide if I wanted to stain, or whether I wanted to keep this more rustic look. In the end, I did decide to put a coating on the wood to add some gloss to it, but I'll cover that in a minute. Once I had all my pieces, and the wood was sanded down, I still had to tackle the most important step - the assembly. I'll get to that next time.

The tools I ended up needing were the following:

  • Protective Gear - Work Gloves, Safety Goggles, and a Face Mask
  • Jigsaw
  • Hand Saw
  • Hammer
  • Oscillating Power Sander

Friday, June 20, 2014

Reclaiming the Planter Box: Part One

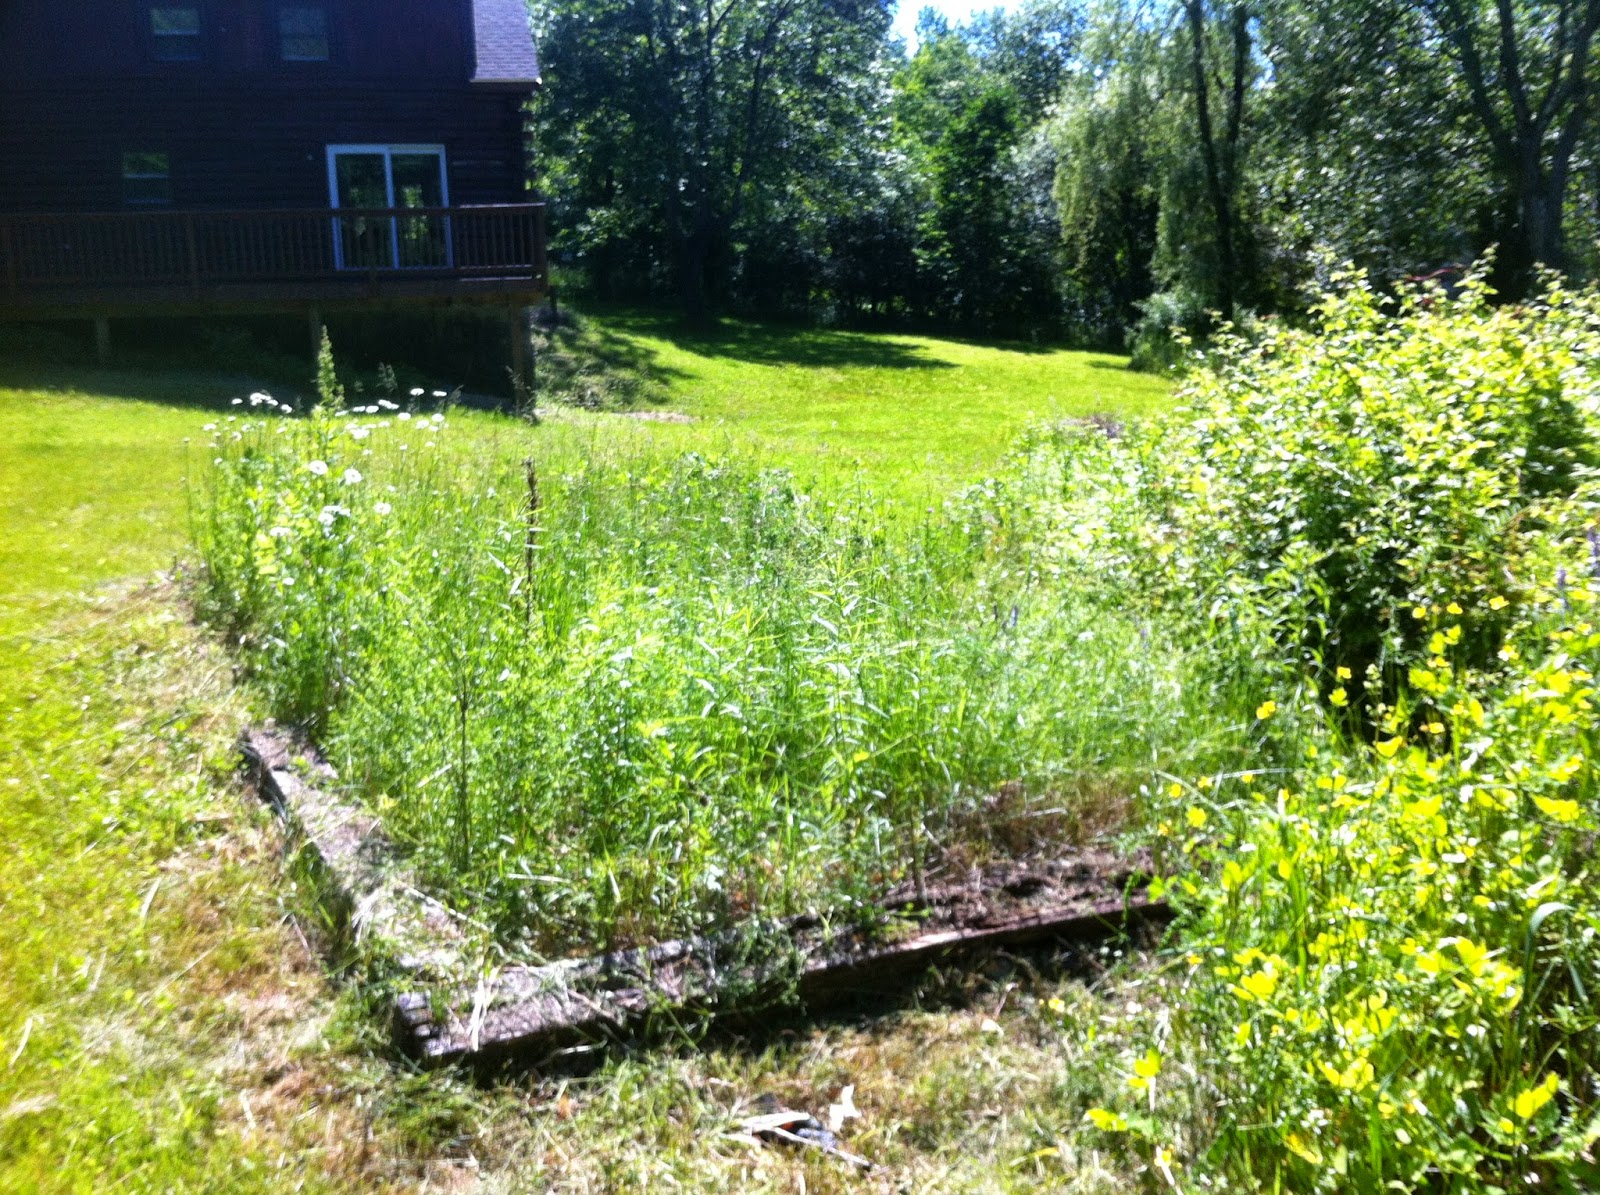
I've always been somewhat ambivalent about planter boxes. When I was growing up, I never saw the point. I always figured you could just dig a hole anywhere in the yard and plant. When I lived down in New Orleans, I tore an older one out of the small yard I had to make space for a fire pit instead. However, as I've delved into the pros and cons, I've come to the conclusion that a planter box would be incredibly beneficial to our homestead, creating a perfect place to grow outdoor vegetables. Therefore, when we uncovered an ancient one in our back yard, I became very excited, but it's going to need a lot of work.

As you can see, it's been neglected for quite some time and is very overgrown. The first step was clearing around the edges with the lawnmower and weed whacker. Then it was time to get down on my knees and get my hands dirty, pulling everything up by the roots. This is what I'm working on now, and it's been very time-consuming. Because we're still getting started, I don't have all the fancy gardening tools yet, like weeding contraptions that pull the roots up like hooks and tillers. I have my hands, a trowel, and a garden shovel. I'll still need to turn the soil and clear out any leftover roots once I've pulled up what I can.

The wood of the box itself is also questionable. A good portion of it is flaking off with age, and other parts are infested with ants, as I discovered when I sat down on one of these areas. The ant problem I plan on treating with either lemon juice or vinegar. I'm not a fan of pesticides, especially near my food. Right now, it's unclear how much of the wood will need to be completely replaced and how much can be refurbished.

Vinegar or lemon juice is going to lower the pH of the soil. I still have yet to test the soil, but I would not be surprised in the least if I found out it was deficient in some nutrients as well. I'll most likely have to mix in some kind of compost, but that's going to have to wait until I have some to use. Some sources say that it would be fine to use rabbit fertilizer without composting it, but I know that the risk of disease is lower if it is composted. I have to wonder if it matters, when there won't be any plants in the box for some time? It's probably safer to just go ahead and compost, though.

I'll keep you updated as the project progresses!

Tuesday, June 17, 2014

Getting Started

We moved into our dream house. It's a beautiful place, with lots of land. Some of my favorite plants are already thriving in the yard - rhododendron, bleeding hearts, irises, and more. It's clear that at one point someone who lived here had very similar goals as we do, but the most recent owner had other things on his mind. The house is amazing, and perfectly livable, but it's going to need a lot of work before it's a fully-functioning homestead. My husband and I have come up with lots of plans from fences to solar panels, but we can't do everything at once.

This blog is meant to share our experiences and progress as we work through these projects and turn our house into a thriving paradise. For more about who we are and what we intend to do, please check out the "About The Homestead" page.

Right now, I've been working on some of the basic yard stuff, which is a much bigger ordeal than it sounds. With nearly two acres of land, our self-propelled push lawnmower took about eleven hours to grind through our overgrown grass. Even with all of our extension cords, the weed whacker won't reach the edges of our property. There was one day where I got so frustrated, that I actually took scissors to part of the lawn. My husband keeps saying we should get a ride-on mower, and I think I'm starting to agree, although I have never used one before.

My next project is to reclaim the planter box in the back yard. Right now, it's completely overgrown with weeds, and the wood sides are beginning to rot. It's going to be a process for sure, but I know it will be worth it when next year comes and I'll have the perfect place to plant my vegetables. For now, everything is still in containers!