Tuesday, June 24, 2014

Upcycled Plastic Flower Pot

Those of you who know me from elsewhere already know that fiber arts are a big part of my life. I am constantly knitting and crocheting, and I have a huge passion for ethical angora. I'm always looking for new projects, and share many of my original patterns on Ravelry.

This project is one of my more useful innovations. As a former apartment gardener, I can always use more plant containers, and with a new foster bunny in the house, I needed to get more greens growing. I decided to solve the problem with my current fiber obsession - plarn. Plarn is a type of plastic yarn that is easy to make at home out of old shopping bags. For those of you unfamiliar with the process, you can check out my YouTube tutorial video below.

For this project, you'll need plastic shopping bags, scissors, a size H crochet hook, and a food-safe epoxy of your choosing (I chose non-toxic hot glue). I use roughly seven shopping bags per flower pot. They're a good size for kitchen herbs with a 4-inch diameter and a depth of 3.5 inches.

CROCHET PATTERN


Create Magic Loop
Row 1:SC 8 in loop
Row 2:2 SC in each stitch around
Row 3:*SC, 2 SC in next stitch. Repeat from * around.
Row 4:*SC in next 2 stitches, 2 SC in next stitch. Repeat from * around.
Row 5:*SC in next 3 stitches, 2 SC in next stitch. Repeat from * around.
Row 6:*SC in next 4 stitches, 2 SC in next stitch. Repeat from * around.
Row 7:*SC in next 5 stitches, 2 SC in next stitch. Repeat from * around.
Row 8:SC around, working in back loops only.
Row 9:SC around.
Repeat Row 9 until the desired depth has been achieved.

Now, because it's crocheted, there are still holes in the sides that need to be closed up. They're less problematic on the bottom, where they offer drainage, but it's less ideal to have water and soil coming out the sides of the pot. At first, I tried using several different kinds of food-safe paints and sealants, but nothing did quite what I was looking for. I found that the best solution was to add an interior lining. Using the discarded bag handles and the chosen epoxy, apply a layer of plastic to the interior walls of the pot.

If you're going to be using the planting containers inside, you'll want to protect your surfaces from water damage. If you're lazy, it's easy enough to put a sheet of plastic beneath the container, or you can use plarn with the same technique to make a base!

BASE PATTERN


Create Magic Loop
Row 1:SC 8 in loop
Row 2:2 SC in each stitch around
Row 3:*SC, 2 SC in next stitch. Repeat from * around.
Row 4:*SC in next 2 stitches, 2 SC in next stitch. Repeat from * around.
Row 5:*SC in next 3 stitches, 2 SC in next stitch. Repeat from * around.
Row 6:*SC in next 4 stitches, 2 SC in next stitch. Repeat from * around.
Row 7:*SC in next 5 stitches, 2 SC in next stitch. Repeat from * around.
Row 8:*SC in next 6 stitches, 2 SC in next stitch. Repeat from * around.
Row 9:*SC in next 7 stitches, 2 SC in next stitch. Repeat from * around.
Row 10:SC around, working in back loops only.
Rows 11 - 15:SC around.

Once that's complete, bring the epoxy back out to cover the base with plastic from the bag handles, the same way you covered the interior of the pot. Feel free to overlap, almost like you're working with paper mache. Alternatively, you could use mod podge to decoupage the base, but that may be difficult with the textured surface. I haven't tried it yet.

Finally, you have the option to add color. Sometimes I enjoy the aesthetic of the bare plarn, but it can also be very attractive to brighten it up with some paints. You'll want to avoid any water-based paints, as these will break down and disappear as you water the plant. Instead, opt for an oil paint.

Friday, June 20, 2014

Reclaiming the Planter Box: Part One

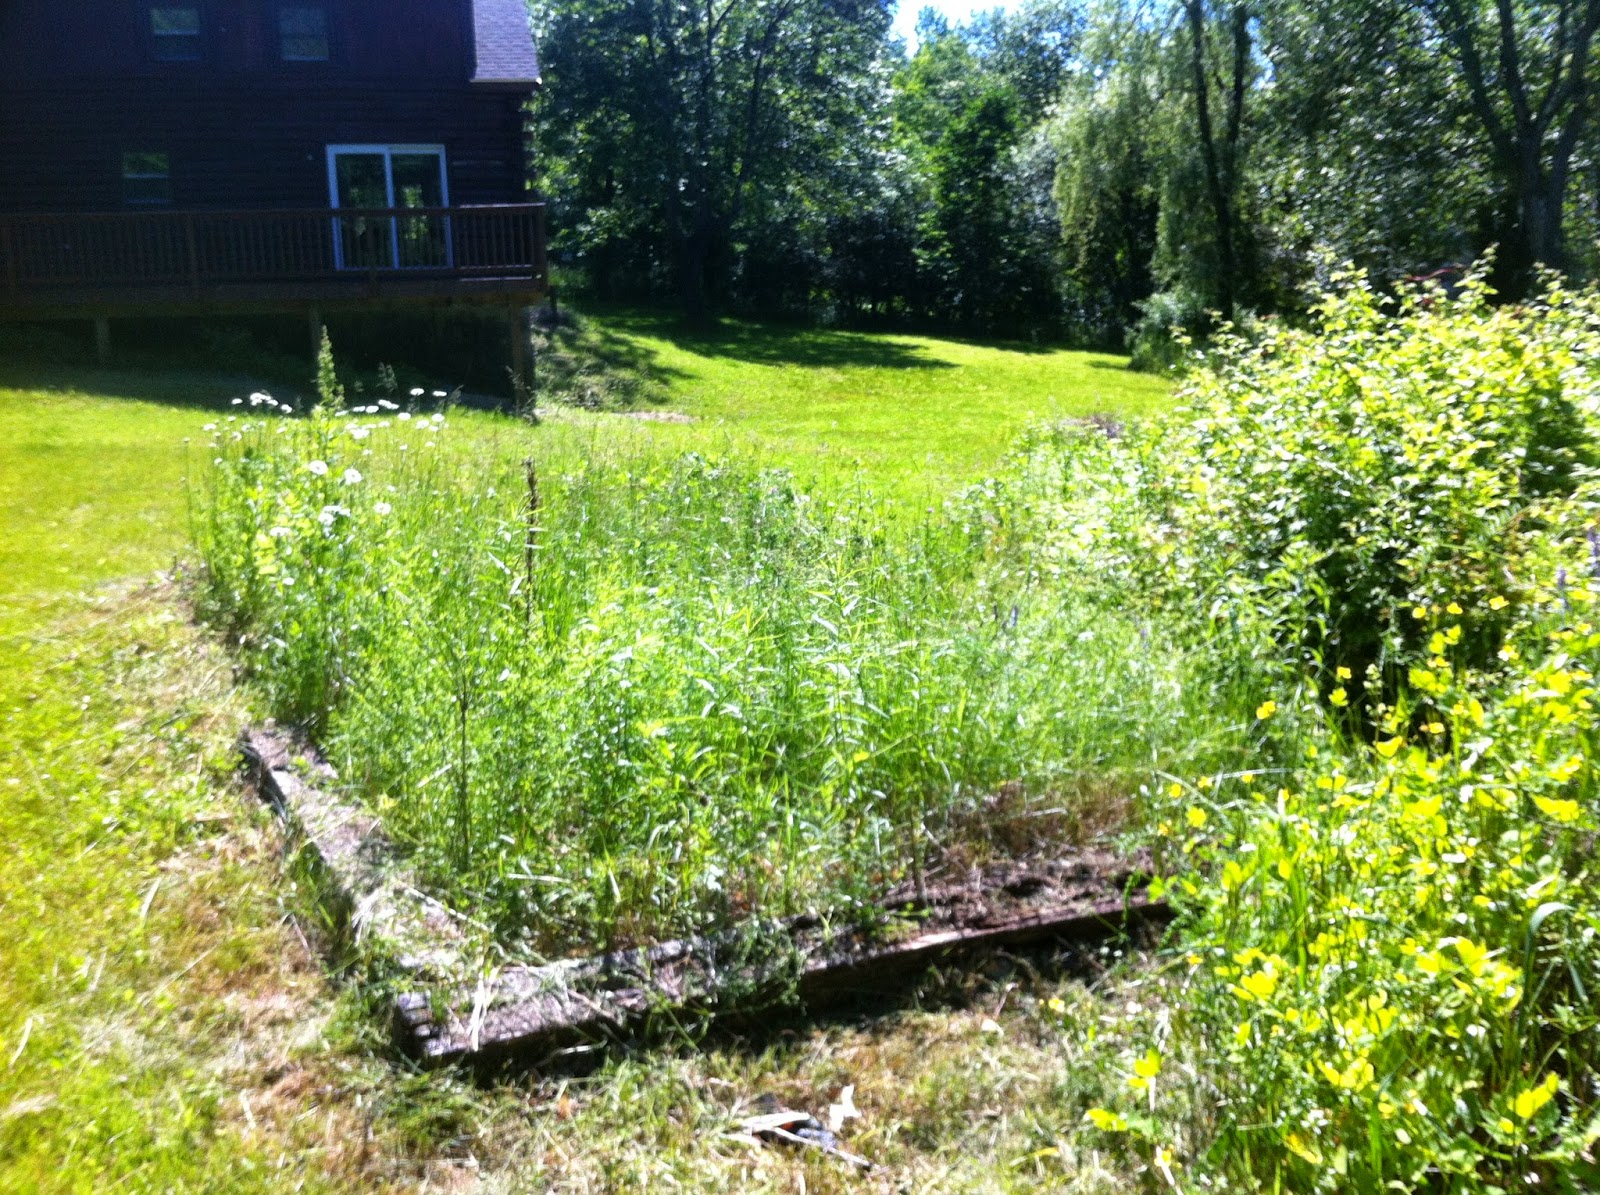
I've always been somewhat ambivalent about planter boxes. When I was growing up, I never saw the point. I always figured you could just dig a hole anywhere in the yard and plant. When I lived down in New Orleans, I tore an older one out of the small yard I had to make space for a fire pit instead. However, as I've delved into the pros and cons, I've come to the conclusion that a planter box would be incredibly beneficial to our homestead, creating a perfect place to grow outdoor vegetables. Therefore, when we uncovered an ancient one in our back yard, I became very excited, but it's going to need a lot of work.

As you can see, it's been neglected for quite some time and is very overgrown. The first step was clearing around the edges with the lawnmower and weed whacker. Then it was time to get down on my knees and get my hands dirty, pulling everything up by the roots. This is what I'm working on now, and it's been very time-consuming. Because we're still getting started, I don't have all the fancy gardening tools yet, like weeding contraptions that pull the roots up like hooks and tillers. I have my hands, a trowel, and a garden shovel. I'll still need to turn the soil and clear out any leftover roots once I've pulled up what I can.

The wood of the box itself is also questionable. A good portion of it is flaking off with age, and other parts are infested with ants, as I discovered when I sat down on one of these areas. The ant problem I plan on treating with either lemon juice or vinegar. I'm not a fan of pesticides, especially near my food. Right now, it's unclear how much of the wood will need to be completely replaced and how much can be refurbished.

Vinegar or lemon juice is going to lower the pH of the soil. I still have yet to test the soil, but I would not be surprised in the least if I found out it was deficient in some nutrients as well. I'll most likely have to mix in some kind of compost, but that's going to have to wait until I have some to use. Some sources say that it would be fine to use rabbit fertilizer without composting it, but I know that the risk of disease is lower if it is composted. I have to wonder if it matters, when there won't be any plants in the box for some time? It's probably safer to just go ahead and compost, though.

I'll keep you updated as the project progresses!

Tuesday, June 17, 2014

Getting Started

We moved into our dream house. It's a beautiful place, with lots of land. Some of my favorite plants are already thriving in the yard - rhododendron, bleeding hearts, irises, and more. It's clear that at one point someone who lived here had very similar goals as we do, but the most recent owner had other things on his mind. The house is amazing, and perfectly livable, but it's going to need a lot of work before it's a fully-functioning homestead. My husband and I have come up with lots of plans from fences to solar panels, but we can't do everything at once.

This blog is meant to share our experiences and progress as we work through these projects and turn our house into a thriving paradise. For more about who we are and what we intend to do, please check out the "About The Homestead" page.

Right now, I've been working on some of the basic yard stuff, which is a much bigger ordeal than it sounds. With nearly two acres of land, our self-propelled push lawnmower took about eleven hours to grind through our overgrown grass. Even with all of our extension cords, the weed whacker won't reach the edges of our property. There was one day where I got so frustrated, that I actually took scissors to part of the lawn. My husband keeps saying we should get a ride-on mower, and I think I'm starting to agree, although I have never used one before.

My next project is to reclaim the planter box in the back yard. Right now, it's completely overgrown with weeds, and the wood sides are beginning to rot. It's going to be a process for sure, but I know it will be worth it when next year comes and I'll have the perfect place to plant my vegetables. For now, everything is still in containers!